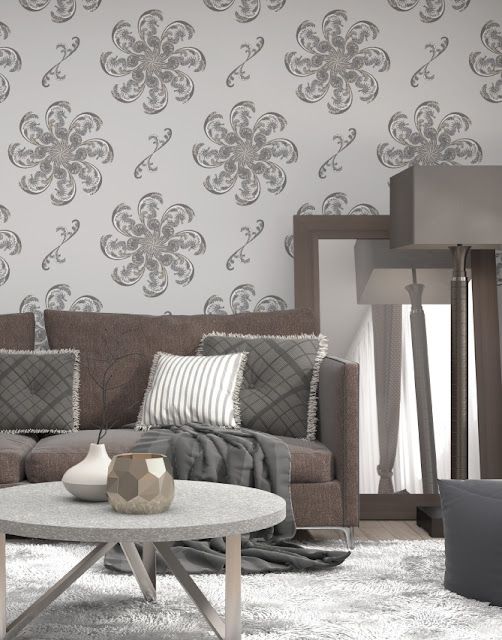
I created some cool pattern overlays in GIMP to show my patterns on different products. If you're used to Photoshop, you will have to get used to doing simple things differently in GIMP, like when you zoom out, pressing ALT won't work, you'll have to select the Zoom tool and click "Zoom Out" or "Zoom In" from the options. Little things like that.... All these little things aside, although GIMP is missing some of Photoshop's tools, it's a powerful image editing tool, and it's free to download.
You will need a room setting with a white wall, or an object that is white. I usually look for images on Pixabay where you can find images with a CC0 Creative Commons status.
I create a pattern in Illustrator, and fill a rectangle with it that would cover the area in my photo that I want to apply my pattern to, and save it as a JPG.
Open your photo and your pattern JPG in GIMP, copy your pattern and paste it into a new layer over your room setting. Make sure it's a new layer. If it says "Floating Layer" right click the layer for layer options and select "To a new Layer". You can reduce the opacity to see how your pattern looks against the image underneath and increase or reduce the size of the pattern image accordingly.
Add a Layer Mask to your pattern layer by right clicking over the pattern layer and selecting "Add Layer Mask" in the layer options menu. Select "White (full opacity)" under Initialize Layer Mask and select "Invert Mask" at the bottom of the dialog box. Click "Add" at the bottom when you're done. Your pattern image will disappear at this point and you'll see your room setting in the underlying layer.
Click on your room setting layer to make sure you're working on that layer, select the Pen tool and draw around the area that you want to cover. You will see your path in the path window if you open "Paths" from the Windows menu. Once you created your path, you can convert it into a Selection by selecting "From Path" under the Select menu or by right clicking your path in the Paths palette and selecting "Path to Selection". Your path will turn into a selection. This is a good time to increase brightness inside your selection if you find it a bit dark. When you look at your Paths palette, you see your selection outlined in a small window. When you click the eye icon, your path will disappear, and when you click it again it will show again.
Fill your selection with white by selecting Fill from the Edit menu, and your pattern will appear again, but only inside your selection. Change the Blending Mode to Multiply in you Layers Palette, and lower the opacity of your pattern to blend with the background and to look more realistic.
Seahorse Wallpaper in Starfish colour way, 27" wide, printed on untrimmed, unpasted clay coated pearlized paper, available at www.juditgueth.com
I create a pattern in Illustrator, and fill a rectangle with it that would cover the area in my photo that I want to apply my pattern to, and save it as a JPG.
Open your photo and your pattern JPG in GIMP, copy your pattern and paste it into a new layer over your room setting. Make sure it's a new layer. If it says "Floating Layer" right click the layer for layer options and select "To a new Layer". You can reduce the opacity to see how your pattern looks against the image underneath and increase or reduce the size of the pattern image accordingly.
Add a Layer Mask to your pattern layer by right clicking over the pattern layer and selecting "Add Layer Mask" in the layer options menu. Select "White (full opacity)" under Initialize Layer Mask and select "Invert Mask" at the bottom of the dialog box. Click "Add" at the bottom when you're done. Your pattern image will disappear at this point and you'll see your room setting in the underlying layer.
Click on your room setting layer to make sure you're working on that layer, select the Pen tool and draw around the area that you want to cover. You will see your path in the path window if you open "Paths" from the Windows menu. Once you created your path, you can convert it into a Selection by selecting "From Path" under the Select menu or by right clicking your path in the Paths palette and selecting "Path to Selection". Your path will turn into a selection. This is a good time to increase brightness inside your selection if you find it a bit dark. When you look at your Paths palette, you see your selection outlined in a small window. When you click the eye icon, your path will disappear, and when you click it again it will show again.
Fill your selection with white by selecting Fill from the Edit menu, and your pattern will appear again, but only inside your selection. Change the Blending Mode to Multiply in you Layers Palette, and lower the opacity of your pattern to blend with the background and to look more realistic.
 |
| Peacock Wallpaper in Blue colour way, 27" wide, printed on untrimmed, unpasted clay coated pearlized paper, available at www.juditgueth.com |
 |
| Japanese Garden Wallpaper in Grey colour way, 27" wide, printed on untrimmed, unpasted clay coated pearlized paper, available at www.juditgueth.com |
 |
| Heron Wallpaper in Rose colour way, 27" wide, printed on untrimmed, unpasted clay coated pearlized paper, available at www.juditgueth.com |
 |
| Victor Wallpaper in Blue and Lilac colour way, 27" wide, printed on untrimmed, unpasted clay coated pearlized paper, available at www.juditgueth.com |

Comments